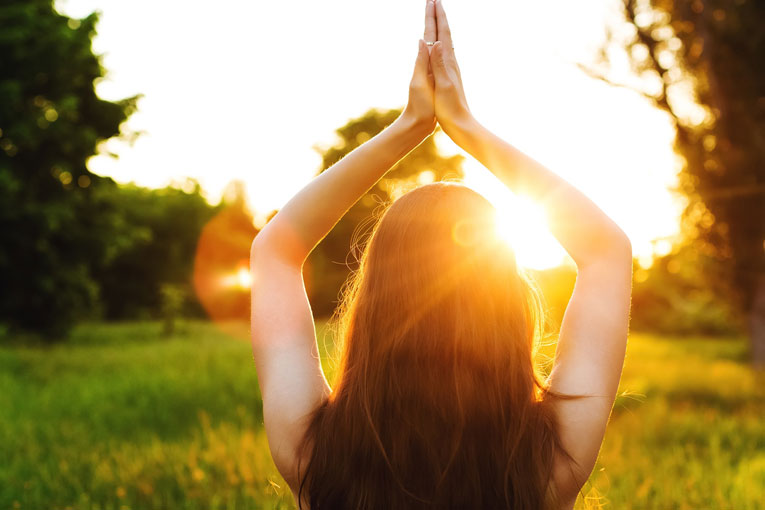
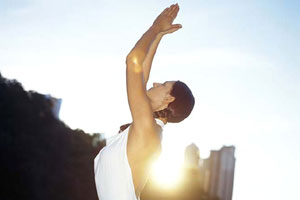
Surya Namaskar yoga
Yoga Surya Namaskar Exercise: Achieve mental & physical sanity
The Universe is composed of movables and immovables.
The entire Universe is sustained by the Sun!
–The Rig Veda 1-11; 115-1
For your convenience, prior to describing the Surya Namaskar postures we have divided this Surya Namaskar Exercise into the following sections:
- Introduction
- Practice Points
- Breathing Rules
- The Basic Process
- Innumerable Advantages
- In Sequential Order
Introduction
The Nomenclature
The nomenclature ‘Surya Namaskar‘ is composed of the term ‘Surya’ (meaning ‘The Sun God’) and the term ‘Namaskar’ (connoting obeisance). Both the words have their roots in Sanskrit.
Tracing Its History
Surya Namaskar has been devised by the Indian sages over the ages as a complete exercise.
A complete Physio-Spiritual Culture
Once you start practicing Surya Namaskar, you will notice that it has a scientific base. You’d appreciate it as the best physio-spiritual compact exercise in the world. Surya Namaskar develops both the mind and the body simultaneously. The exercise aims at a harmonious booster of all the physical features while galvanizing the mind.
What exactly is Surya Namaskar Exercise?
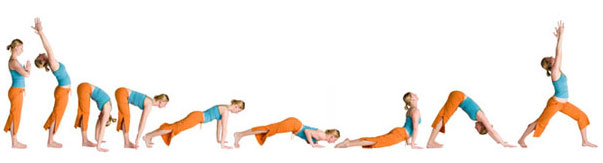
Surya Namaskar is a conglomeration of 12 postures. They are simple. This sequence of a dozen of yogic exercises blends breathing and physical activities in a scientific manner. The Surya Namaskar postures follow in such a way that if posture No.1 makes the yoga practitioner bend backwards, then posture No. 2 needs the practitioner to bend forwards. The consequence is an all-round exercise of the body.
Who can do Surya Namaskar Yoga
- Both the sexes can do Surya Namaskar Yoga
- Any normal person who has attained eight years of age can perform Surya Namaskar Yoga.
What about those with poor health & the elderly?
Those with a poor constitution can also practice Surya Namaskar. But, it is advisable to have a health check-up carried out prior to taking up the postures. If they get the nod from the physician, they will observe a definite improvement in their overall physique even as their mental strength will start turning positive. In fact, their outlook toward life will change for the better.
The elderly people can surely do the 12 postures. These exercises carry special benefits for the people who are approaching the middle ages. It is at this age that the limbs start stiffening.
- Surya Namaskar is also ideal for those people who may have left exercising. They will regain their youthful vigor.
- Surya Namaskar Posture are complete in themselves
Suppose one is unable to do the asanas for various other physiological reasons. One can then practice the Surya Namaskar postures as the sole exercise module.
The requirements
Absolutely nothing! And, that’s the best part of all the yogic byams or asanas (exercises). They are neither expensive nor time-consuming. What is more, each of them including each of the 12 Surya Namaskar postures can be completed within a few minutes.
You can do the Surya Namaskars in your home.
When to do the Surya Namaskar Yoga?
The Surya Namaskar postures are a very effective means to limber up. Hence, they are generally carried out before the other asanas. At the end of the 12 postures, you will feel refreshed and relaxed.
Notably, if you are in a rush you can simply do the 12 postures within the span of just 15 minutes at the most. These complete exercises will substitute the other asanas which you have not been able to do that day. The effect would be equally energizing!
Practice Points of Surya Namaskar
Know The Benefits of Surya Namaskar
You will witness the benefits yourself right from Day-1. Perform them as recommended and see your body stiffness disappear. Our bodies remain stiff generally in the mornings. So, perform the 12
postures only in the morning hours. Once you complete the Surya Namaskars, your entire body will get invigorated and you’ll become active — ready to proceed with the day.
Where to perform
The Surya Namaskar is done in airy open spaces. Any room can also be used for the 12 postures provide they are not cramped and are not stuffy.
The Direction Matters
Always do the Surya Namaskar facing the East – so that you can offer the obeisance to the rising sun.
When to perform
The recommended time is sunrise. Never perform them during the day or in the nighttime.
What to wear
Don just the minimum of clothes. They should be made of cotton and absolutely light. Such bare accessories have two benefits: The skin can breathe. And, the body can absorb the sun’s rays.
Preparing for the postures
Finish the morning purges and bath. But, practice the Surya Namaskar only on an empty tummy! Remember to commence the 12 postures only after your body cools off following the bath.
Rhythm of the 12 postures
There is a definite rhythm in which the postures follow one another. Concentrate on the movements and the breathing sequences as you go through each of the postures.
Length of each position
Each position is to be held on to for roughly five seconds.
Avoid Strains & Jerks
Try not to exert your body while performing the postures. Avoid strains and jerks.
- Stop executing the movements if you experience pain in any portion of your body while performing any position.
- Slowly return to the starting position.
- Relax.
- Don’t execute them any further.
- You can then shift to the breathing asanas.
- Start the 12 postures the next morning.
Concluding Remarks
You can bathe after 20 minutes. You can wipe off your sweat with a wet towel. After performing the 12th posture, do the Savasana to bring about total relaxation.
Breathing Rules of Surya Namaskar that come naturally
Breath Retention & Hold Out
Altogether six complete inhalations and exhalations are made during the course of the 12 Surya Namaskar postures. Breath retention is done only for five seconds during the 2 & 12 positions. On the other hand, the breath is held out for the same seconds in position 6.
Note that each position commences either with inhalation or exhalation.
For the Beginners
The beginners may find it rather tough to hold out or retain their breath. They can do free breathing.
Regulated Breathing Comes Naturally
Once they succeed in regulating their breathing, they can practice retention and hold out their breaths. With dedication and practice, beginners should be able to master regulated breathing within a day or two. At times, the mastery may come in a week’s time. It will come naturally, though.
Synchronize Breathing with Movements
After the beginner has control over breathing, he/she can synchronize the inhalation and exhalation mechanism with the body movements. For such synchronization, the person must always remain aware of the particular movements and the required breathing move.
The Basic Process of Surya Namaskar
The progressive Stages
As you advance from one Surya Namaskar stage to another, you are in the process of completing the inter-connected links among the 12 postures. Actually, one stage merges into the other. To proceed in the ascending order, numerically speaking, i.e., from Posture to Posture 12 consecutively.
Gestation Period
- One posture or position must be held on to for five seconds. However, the beginners can opt to hold on for three seconds in each position.
- A pause prepares the stage for the commencement of the subsequent position. Such a gap should be of just two seconds between two successive postures or positions within a Namaskar cycle. For the beginners, this gestation period (between two positions) can be of five seconds.
Frequency Roster
A cycle of 12 postures completes one Namaskar. You can repeat the Namaskars at an even pace several times. But, don’t exert yourself.
Each position within a Surya Namaskar should be done slowly. The beginners need to proceed cautiously and gradually. Children can, of course, do the postures faster than adults.
Caution Note
It is only with practice that one can do the Namaskars rather swiftly without leaving any gap between the positions. But fasten the pace only after you master each position.
Practice Duration
Practice the Surya Namaskars for 15 minutes at the most if you are not practicing any other asanas. But, do take a rest in between.
However, if you wish to do other asanas as well, just practice three Namaskar cycles. With experience, you can keep on increasing the cycle by three every week till you reach 12 cycles.
Instead of hurrying to complete several Namaskar cycles, it is better to systematically complete three cycles. In the latter instance, there will be better coordination between breathing and exercising.
The Innumerable Advantages of Surya Namaskar
Surya Namaskar has advantages and no side effects. In fact, each of the 12 postures of Surya Namaskar renders the body suppleness and strength coupled with mental peace. Moreover, you can also cure many ailments by performing the well-coordinated movements of Surya Namaskar. Your breathing clears, concentration power increases and your entire physiology gets invigorated. You gain confidence and also develop a reverence for the Almighty!
The Other Advantages of Surya Namaskar
The Surya Namaskar exercises are ideal warm-up and conditioning exercises for the entire body and the mind. They prepare you to encounter the challenges of the head head-on.
- The Surya Namaskar postures remove the psychosomatic tensions and help in calming down the mind.
- The endocrine system is harmonized.
- The heart and the lungs get energized due to controlled breathing.
- The nerve points as well as the nervous system improve.
- The spine gets stretched. It becomes supple. Spinal area pains and aches are relieved.
- Spinal curve disorders and deviations get corrected.
Other Innumerable Advantages of Surya Namaskar
Surya Namaskar stimulates the peristalsis and thereby helps in regulating bowel functioning.
Surya Namaskar movements tone up the organs and limbs. The limbs become symmetrical while the internal vital organs become more functional.
The entire muscle system becomes stronger. That includes the muscles of the eyes, neck, shoulders, arms, hips and legs.
You can cure ailments like sciatica, diabetes, blood pressure, mental tension, backache and indigestion among others.
The abdominal exercises relieve the abdominal viscera via the stretching and contracting movements of the abdominal area. The massages prove to be beneficial for the abdominal muscles as well.
Surya Namaskar exercises are best for reducing abdominal flab. The fat in other parts of the body like the thighs and the waist also gets reduced.
The wrist joints in particular as well as the other joints get loosened. Mentionably, as you change the Surya Namaskar postures from 3 to 10, your body weight is supported mainly by the wrist joints. This makes them stronger as well.
Blood circulation improves to all the organs and parts of the body.
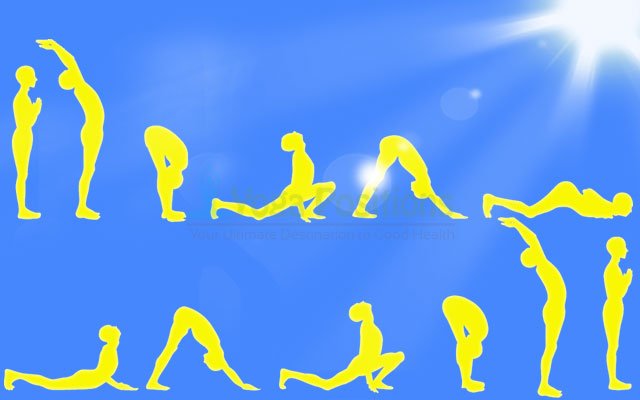
Surya Namaskar In Sequential Order the 12-fold of Surya Namaskar
Can one do the postures in random order?
Unfortunately, No! One cannot do the 12 postures in random order. On the contrary, one must practice the 12 Surya Namaskar postures in the sequence from Posture-1 onward. Hence, it’s important that as you start practicing the positions, you also memorize the sequences.
Actually, Surya Namaskar can be practiced in several variations. It is so very dynamic in nature.
The one dealt with here combines breathing with the Yoga Asanas.
You can also draw up an illustrated chart showing the position sequences. Then, paste the chart at eye level in the room where you exercise. This step will help you to memorize the sequences fast and easily.
Surya Namaskar includes 3 Yoga Asanas
Every Surya Namaskar posture includes the principles of three yogic Asanas, viz., Talasana, Pada Hastasana and Bhujangasana.
Is there any easy means of Co-ordination?
The easiest means of coordinating the breathing and movements is to do them as recommended. No doubt, one may encounter problems in the initial stages. But, as one practices the positions regularly, one will be able to coordinate and synchronize the movements with the breathing strategies or cycle.
When should women not do Surya Namaskar?
Women should refrain from doing the Surya Namaskar postures during the periods and also when they are pregnant. However, they can readily do the exercises once they return to their normal state of physiology.
The easiest way to memorize the breathing cycle
Simple. Just remember that you should inhale while bending backward and exhale while bending forwards.
The position-cum-breathing chart
Here is the 12-fold Surya Namaskar position-cum-breathing cycle. You will notice that Positions 1 & 12; 2 & 11; 3 and 10 are identical. You will also notice that inhaling is done six times:
- Stand straight and exhale completely.
- Inhale. Simultaneously, stretch the arms overhead. Hold the breath for about five seconds. (1st breath)
- Bend forwards as far as possible without straining yourself. Exhale.
- Move the right leg backwards even as you inhale. (2nd breath).
- Now, move the left leg backwards to the position of the right leg, and exhale.
- Lie down on the floor. Inhale. (3rd breath).Then exhale as you lower the body. Hold the breath while remaining in the position.
- Head and trunk are to be raised on arms. Inhale. (4th breath).
- Take the inverted ‘V’ position. Exhale.
- Bring forward the right foot. Inhale. (5th breath).
- Bring forward the left foot. Bend ahead as much as possible. Exhale.
- Stretch the arms overhead while you inhale. (6th breath). Hold the breath.
- Stand straight. Exhale.
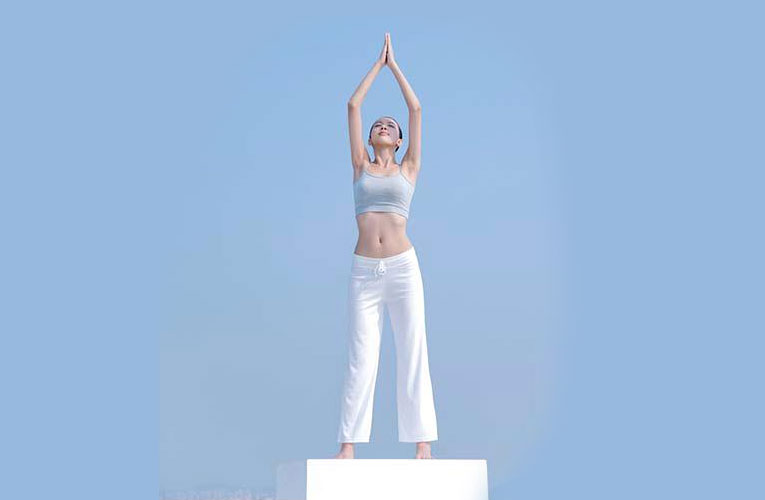
The 1st Surya Namaskar Posture

Taking Position The 1st Surya Namaskar. This is the commencing position. Assume a calm and prayerful mood. Prepare to pay obeisance to the Sun.
Positioning the Limbs
- Look towards the East. Stand straight on your seat (mat/carpet/blanket).
- Both your feet must be on the same level and about 12 centimeters apart.
- Keep your arms close to your body. They must be kept straight down.
- Ensure that your knees are stiff. The back portion of your head must be in the same line as your back and heels.
- The abdomen needs to be drawn in. Raise the chest.
- Bend your arms and place your hands before the chest. It should be in a prayerful gesture.
- Lightly join together both your palms. The palms should be turned upwards.
- The fingers must be stretched out. They must point upwards.
- The thumbs as well as the fingertips of both the hands must touch each other.
- The thumbs should be touching the middle portion of the chest. The elbow up to the forearms should be in alignment.
Commencing the Namaskar
- Look ahead. Don’t open the mouth. You must be well placed or balanced while standing.
- Exhale.
- Breathe normally.
- Condition your mind in such a way that your body is relaxed.
- Now, worship the Sun.
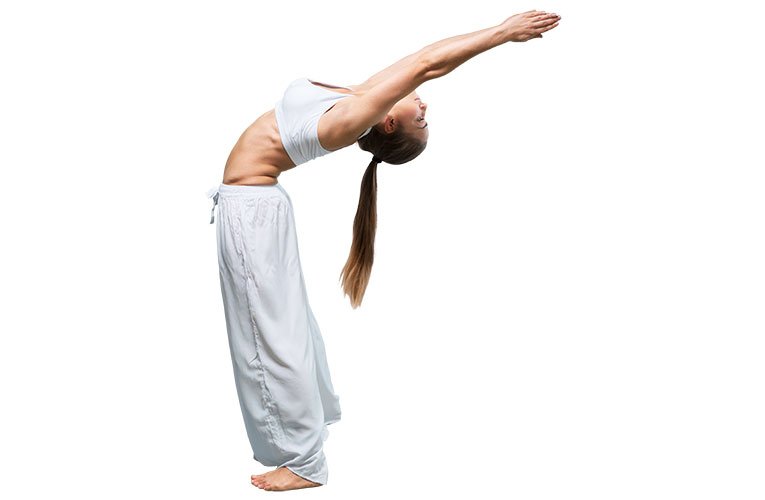
The 2nd Surya Namaskar Posture
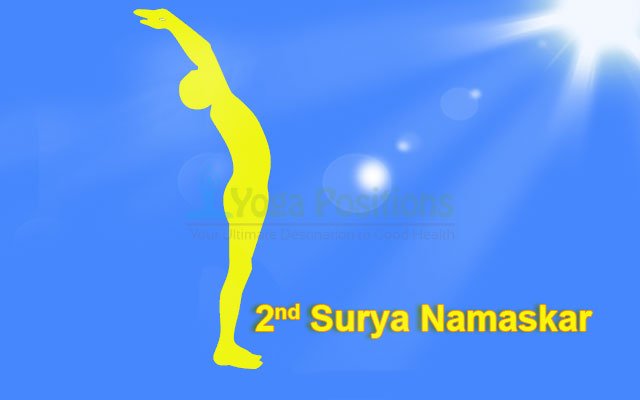
There are altogether six inhalation steps. This posture starts that inhalation process.
The Techniques The 2nd Surya Namaskar
- First, slowly exhale completely.
- Then, inhale slowly but deeply (First breath). Simultaneously, open up your hands.
- Next, turn the palms outwards. Slowly raise your arms upward and forward. You must bend your knees and the elbows as much as possible. Both the elbows and the hands should above the head.
- The arms must be straight and stiff. The inside portion of the upper arm must touch the ears. The arms should be in a straight line and parallel with the trunk.
- Maintain the shoulder distance between the hands.
- After that, complete the inhalation. Look between the fingertips. Hold your breath as you stand straight. The feet must be placed firmly on the ground.
- Finally, stretch upwards. Without any pause and in a smooth movement, stretch your arms backward. Your eyes must follow the fingertips. At the same time, slowly bend backward from the waist onwards to the farthest position possible from your trunk and head.
Points to remember
- While bending backwards, your spine must bend as well as your head, neck and the shoulders. However, the bending backwards must be without strain.
- Never strain yourself.
- Ensure that you are not bending the knees and elbows.
- But push forward your pelvis. Keep your chin up. Arch the neck and the back.
- But maintain your balance.
- The elbows and the knees must not be bent at any point of time. They must be straight and stiff.
- The head must be held steadily between the upper arms.
- The upper arms must touch the ears.
- Look back between the fingertips to the extreme point you can identify.
- As you reach the limit of the stretching-out position (of course, without straining yourself), remain in that posture for approximately five seconds. Hold your breath and then prepare for the third Surya Namaskar posture.
Advantages
- The ribcage capacity increases. The chest expands.
- The abdominal muscles are straightened when they are gently pulled during the stretching moments.
- The back is compressed while the front portion of the neck is stretched.
- The spine especially the sacral and the lumbar sections are made supple.
The 3rd Surya Namaskar Posture
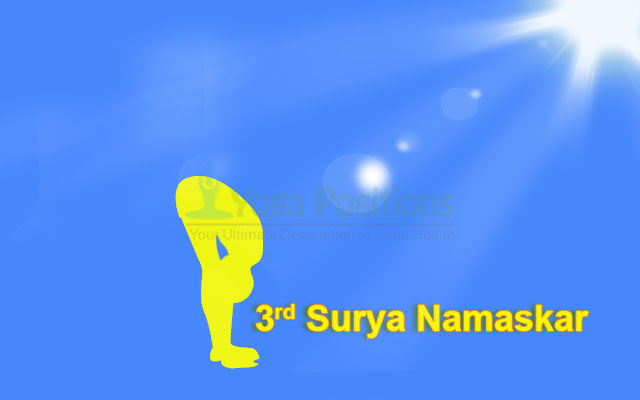
This posture is almost the opposite of posture 2 and it encompasses the Pada Hastasana.
The Techniques The 3rd Surya Namaskar
- Slowly exhale. At the same time, move forward your arms and head together. Bring them downwards.
- Keep the head between the upper arms touching your ears
- Starting from your hips bend the trunk forward.
- Draw in the abdomen.
- Bring down your hands to the floor. But, keep the arms stretched out. The legs must be kept straight.
- Without straining yourself, use your fingertips to press the ground.
- Try to put your palms flat on the ground. The palms should be placed roughly five inches in front of your toes. The palms must be at shoulder width and parallel to each other.
- The pelvis has to be pushed backwards.
- Now using the palms press down on the floor.
- Your doubled-up body will resemble a hairpin at this juncture.
- While in this position draw in your abdomen, pull your head inwards and try to touch the knees with the forehead. Remember not to put pressure on your thighs and the back.
- Try to touch your chest with the chin.
- The heels must be pressed to the ground and the knees kept absolutely stiff.
- Look towards the chest.
- Hold on to this posture until you completely exhale.
Caution Words
- The pain you experience as you try the posture for the maiden time will disappear with practice.
- Don’t be disheartened if your hands fail to go beyond the ankles. With patience try to proceed beyond the initial stage every time you try this posture.
- The more you can curve your back, the closer you will be towards the ground.
- If you are a novice, you can, of course, bend your knees a bit. Subsequently, you will be able to easily place your palms flat on the floor even without bending your knees.
- With practice your fingers will be able to go closer to the ground.
- During the initial days, simply try to touch the ground with your fingertips.
- After you succeed in touching the ground without pain, concentrate in placing your palms on the ground.
- The palms should lie on the ground and the fingers must point ahead like the feet. Mentionably, the palms put on the floor (up to posture 10) should always be placed in a similar fashion.
- The distance between the palms should be adjusted after you place your palm on the ground.
- The build of your body will determine the distance of your palms as they lie on the floor.
- Keep the forehead close to the knees.
- The stretches (forward and backward) should be increased slowly.
Advantages
- Your hips and abdomen will be trimmer. This posture is ideal to trim down the excess flab in those portions.
- This stretching exercise has a multi-purpose effect. It strengthens the muscles — especially in the back calves and thighs besides the neck, and also the sides.
- The posture stretches the hamstring muscles.
- The forward bending action tightly contracts the abdominal muscles.
- The waist and the hips are simultaneously exercised.
- Your glands – parathyroid, pineal, pituitary and thyroid – gain blood supply.
- It also acts best on the spine.
- The spinal lumbar portions become supple. This posture works best in lower and the sacral lumbar areas.
- When you push the pelvis, you ease the fifth lumbar vertebra.
- The facial tissues are nourished and there is additional blood flow to the brain as you bend your head and pull it towards the knees.
The 4th Surya Namaskar Posture
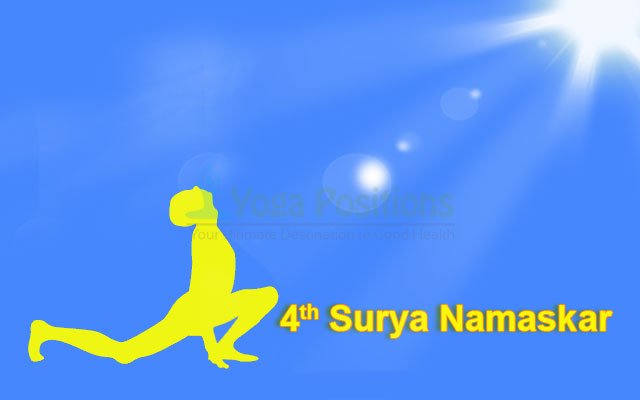
The 4th Surya Namaskar: As we have stated, one position merges into the other. It was also pointed out that every two positions right from the beginning stretch the body in diametrically opposite directions thereby exercising the entire body.
Methodology The 4th Surya Namaskar
- Your palms and left foot must be placed firmly on the ground.
- Now inhale (second breath) slowly. Bend the knees a bit.
- But, don’t bend the arms.
- Press down hard on your hands placed on the ground.
- Lower the posterior.
- Your right leg must be stretched straight to its entire length.
- Simultaneously slide the right foot backwards to the extreme position. Then, firmly rest the foot on the toes.
- Raise your head and trunk.
- The right foot during these movements must be fixed on the floor in a perpendicular fashion. That foot and its thigh should be in a line with the vertically placed right arm.
- Even as you keep the right leg extended and straight, see that your right knee is slightly over the ground.
- During this leg stretching move, your left leg should also be bent at the knee. Keep the left sole and the left palm firmly placed on the floor.
- Notably, your extended leg must remain straight and stiff. The knee must be slightly above the floor.
- The beginners can, of course, keep their knees on the floor. It will give them support.
- Bring the left thigh closest to the trunk.
- The left knee has to be a bit ahead of the vertical left arm.
- The left side of the left thigh has to touch the vertically placed left arm.
- Maintain your balance while you press on the ground on your left foot as well as both your palms.
- In this position, you must stretch backward (to the maximum limit) your neck and head besides pushing forward your chest. Your spine should also be arched. Your chin will remain raised as you look upwards.
- See that you are supporting your body weight on the right foot toes, the left foot, and the hands. You should grip the floor with these three portions of your body.
- Slowly complete the exhalation and hold on to this position till you complete the exhalation.
Advantages
- Position 4 stretches the neck and spine in a direction that is opposite to the third Surya Namaskar position.
- Simultaneously, your thighs, arms and the pelvis are also stretched and therefore exercised.
The 5th Surya Namaskar Posture
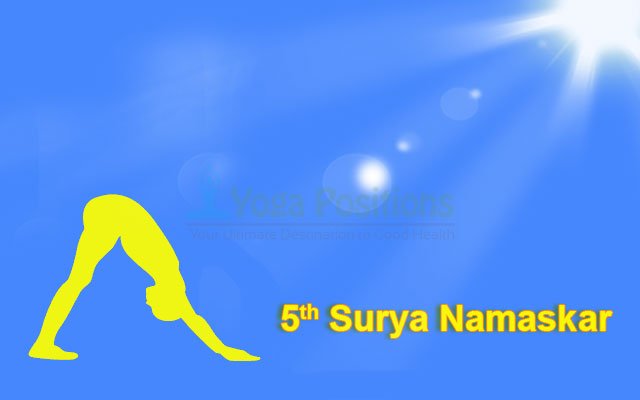
From this point onwards till the completion of the eighth Surya Namaskar posture, you’ll have to keep your feet in the same position.
Methodology The 5th Surya Namaskar
- While carrying out the complete exhalation of position four, you’d be proceeding to this fifth posture.
- Keeping intact the right leg, the vertical arms and the palm positions, stretch the bent left leg on the floor. Firmly rest it on the toes.
- The knees must be above the ground while the legs must be straight and parallel to the floor.
- Ensure that the extended left leg is in line with the left arm which is being kept straight during this change of position.
- Remember that your feet will now remain in this position till the completion of the eighth Surya Namaskar posture.
- The toes and palms should be pressed on the floor.
- Now lift your body from the floor in such a way that it is an inclined state downwards from the shoulders to the toes.
- Your toes and hands will be supporting the body’s weight.
- The vertical arms and feet will have to be propped up.
- The legs, thighs, the trunk and the head will now be in one line.
- Keep the palm fingers pointed ahead.
- Look at the floor.
- Remain in this position. Maintain your balance.
- As you remain comfortably in this posture, exhale completely.
Advantages
- Your abdominal muscles are comfortably stretched.
- This posture also improves your posture.
- Simultaneously, your toes, feet, ankles, legs, back, shoulders, arms and the wrists are exercised.
The 6th Surya Namaskar Posture
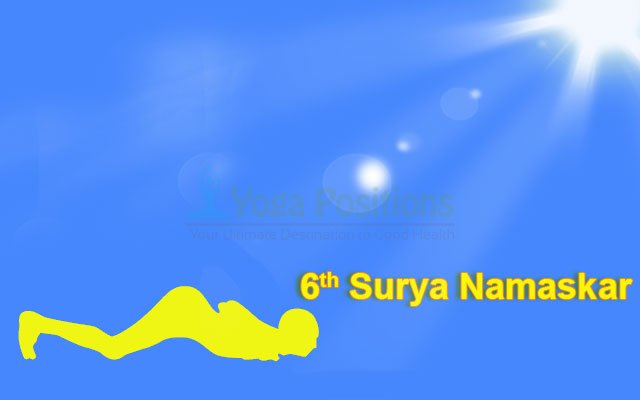
Now, you are about to conclude the first half of the 12 Surya Namaskar postures.
The sixth position includes the Sashtanga Namaskar pose.
Only eight portions of your body touch the ground in this position.
They are your forehead, chest, toes, knees, and your palms.
Methodology The 6th Surya Namaskar
- As you remain motionless properly balancing your body, slowly but deeply inhale (The third breath).
- In the meantime, your toes and hands are still being firmly placed on the floor.
- Remember that you cannot move the palms from their positions.
- Also keep in mind that you’d have to balance your body on the toes and put pressure on the forearms.
- After completing the inhalation process, hold the breath for just three seconds and then slowly start the exhalation process.
While breathing out, slowly lower your body to the ground. Here’s how you should do it. But do follow the sequence:
- First, bend your knees and the elbow;
- Then, slowly lower your knees followed by the upper abdomen, the forehead and finally the chest.
- When you start the body lowering process, your body must be rigid.
- Try to place your forehead at the maximum point possible on the ground.
- But your lower pelvis and the abdomen must be kept at the highest point possible away from the ground.
Those having flab on their abdomen may find this posture rather difficult. The sagging fat in the abdomen area may pose problems. However, they can draw in their abdomen while keeping their lower abdomen and hips above the floor.
- Place the palms on the ground on the respective sides of your chest.
- Raise the bent elbows and keep the arms close to your sides.
- Without moving the feet, keep them in a perpendicular position.
- Only your curled up toes must be touching the ground.
- Draw in the abdomen and complete the exhalation.
- Hold out the breath for a few seconds remaining in the same position.
- Allow your muscles to slacken.
Summing Up
- Let’s now sum up certain important aspects pertaining to this posture:
- One, your palms must lie flat on the ground beside the chest;
- Two, the body should lie prostrate on the floor
- Three, the abdomen must be drawn in;
- Four, the lower abdomen has to be slightly raised from the ground;
- Five, the hips should be raised from the floor.
Advantages
- The entire body gets energized.
- The leg and wrist joints get straightened.
- This position also has positive effects on the abdomen, forearms, back, and the upper arms.
The 7th Surya Namaskar Posture
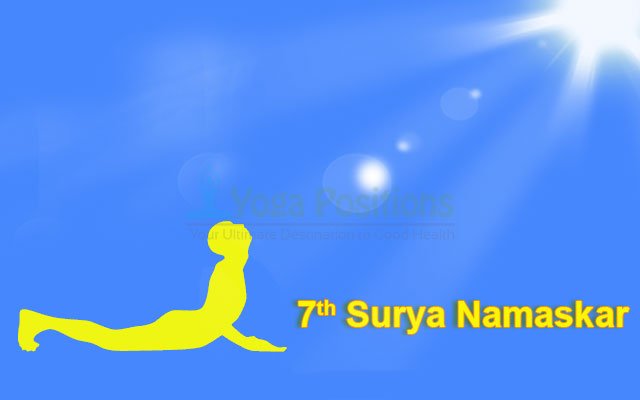
The seventh Surya Namaskar posture resembles Bhujangasana. There is a minor but fine difference between the two, though. In this posture — unlike that in Bhujangasana – you will have to keep the pelvis, thighs and knees slightly raised from the floor. Moreover, here you will have to keep your elbows straight.
Methodology The 7th Surya Namaskar
- As you shift to this seventh position, lower your pelvis to the ground.
- But firmly keep the palms, knees and toes firmly on the floor.
- Bend backward your neck and head even as you keep your chest on the ground.
Slowly but deeply inhale (The fourth breath). And while you inhale perform the following movements:
- First, press down the toes and palms on to the ground.
- Then, raise your head.
- Next, smoothly lift as high as possible the upper and the lower portions of your trunk from your waist.
- Keep your arms and legs straight. In fact, the vertically kept straight arms will help you prop the trunk.
- Look towards the sky.
- Inhale completely and remain in this position for five seconds.
- Focus during this moment on your spine base.
Points to Remember
- Don’t change the positions of your palms and feet as you stretch up your trunk and head.
- You should keep your elbows stiff, push forward the chest, bend backward the neck and head, and arch your spine to the optimum level without straining yourself.
- The lower portion of your body from the waist up to the feet should remain parallel to the ground.
- Your feet must remain perpendicular to the floor.
- Only your toes and palms keep contact with the floor.
Advantages
- Your waist will remain supple and firm.
- The abdominal muscles are stretched which reduces the bulging bellies.
- Your pectoral muscles get expanded and this develops the chest.
- It is a good exercise for the neck muscles. Those in the front portion become stretched.
- The nape muscles become compressed.
- The wrists and shoulders become stronger.
- The triceps carry the body load during this posture. This makes the triceps supple and strong.
- If you have flabby upper arms, they will be corrected.
- The best effects are noticeable in the spine. The lumbar portion of the spine is made more flexible when your spine bends backwards.
- Minor abnormalities of the spine as well as slipped discs are corrected.
The 8th Surya Namaskar

The eighth Surya Namaskar posture stretches the body in the direction opposite to the seventh. The body takes the forms of an inverted ‘V’ and that of a triangle with the floor constituting its base.
Methodology The 8th Surya Namaskar
- Exhale even as you keep your toes and palms firmly placed on the ground.
- Bend your head.
- Gradually raise the knees and also lift your hips as high as you can.
- Slant backwards the arms and then straighten them.
- Push the hips further backwards.
- Stretch the hamstrings.
- While you place your feet flat on the floor, the heels should be firmly placed on the ground.
- But don’t strain yourself.
- Arch your back.
- Bring down your head between the upper arms. Try to place your chin on the chest.
- The elbows and knees should remain straight and rigid.
- Draw in the abdomen.
- Completely extend the arms and legs.
- The body should be kept inflexible right from the palms to the feet.
- Try to view your navel.
- Complete the exhalation process.
- Stay put in this position for five seconds as you hold your breath.
Points to Remember
- If you are doing the posture correctly, your body (particularly the arms, trunk and the legs) will resemble an inverted ‘V’.
- The body, therefore, constitutes a triangle with the floor forming the base.
- The body is balanced only by your toes and hands.
- All the movements must be synchronized.
- As the body forms the inverted ‘V’, the entire body will be stretched to the maximum possible limit.
- Interestingly, when you raise your hips, your head automatically goes downwards.
- In the initial stages, the legs may slide and/or there may be some pain in the Achilles heel (tendons), thighs, calves, ankles and arms. But, with practise these discomforts will disappear.
- Posture 8 is just the converse of posture 7 since it bends your spine in exactly the opposite direction.
Advantages of The 8th Surya Namaskar
- Reduces tension and fosters a sense of overall relaxation.
- Relieves disorder problems.
- Flatulence is cured.
- The position expands and opens the chest thereby improving breathing.
- The spinal sacral portion becomes suppler.
- Blood supply is stimulated to various parts of the body like the internal organs, heart, face, scalp and the brain.
- The veins in the legs become relaxed. Thus, varicose veins and sciatica are counteracted.
- The legs also become strengthened since they are stretched in various positions. The ligaments, tendons, joints and muscles are positively affected.
- Similarly, the ankles, calves, hamstrings, hips, abdomen, back, neck, shoulders, upper arms, forearms and the wrists are made flexible.
The 9th Surya Namaskar
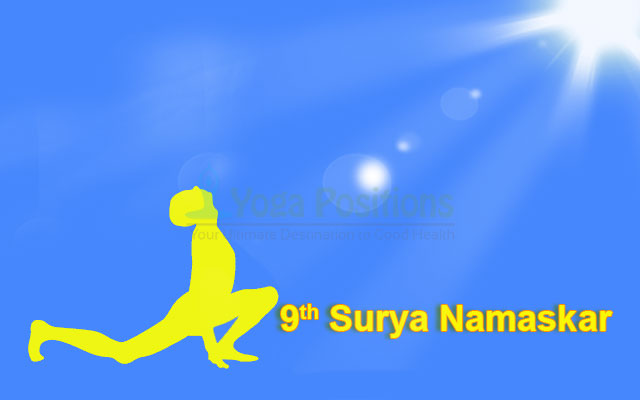
The 9th Surya Namaskar marks the return to the starting position. Mentionably, the fourth position is repeated, but backward. After the completion of this position, you will have to return to the third posture which, on the other hand, constitutes the 10th posture.
Methodology The 9th Surya Namaskar
- Don’t bend the elbows or change the palm position on the ground.
- Take breath number five (inhale).
- Slightly bend the right knee.
- Slide forth the right leg.
- Place it flat on the ground.
- The right leg should be roughly five inches behind the right arm.
- Bring the right arm to a vertical position with the left arm.
- Keep the right thigh near the raised trunk.
- The right knee must be a bit ahead of the right arm.
- The right thigh should touch the vertically kept right arm.
- Your backside and trunk will automatically lower themselves the moment the right foot is slid forward.
- Rest the toes of the bent and lowered left knee firmly on the ground.
- The left foot must be in a perpendicular line with the floor.
- The left leg must be extended straight with the knee slightly above the floor.
- Ensure that the foot and the thigh of the extended left leg are in line with the vertical left arm.
- Raise upwards the head and the trunk.
- Your chest must be thrust forward, head and neck stretched back and the spine arched to their maximum possible limit.
- Look upwards; your chin will be raised to the highest point.
- Your body weight will now be supported on the left toes, right foot and on the hands.
- Hold on to this position as you exhale completely.
The 10th Surya Namaskar
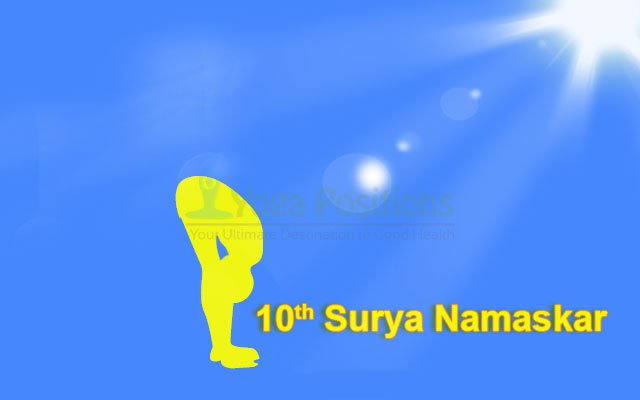
Begin the 10th Surya Namaskar by resuming the third posture.
Methodology The 10th Surya Namaskar
Here’s how you’ll return to the third Surya Namaskar posture:
- Slowly exhale.
- Your palms must still be placed firmly on the ground.
- Now bend the left knee.
- Slide the left foot forward and bring it in line with the right foot.
- Place the sole flat on the ground roughly five inches behind the vertically placed left arm.
- Simultaneously raise high your hips.
- Bend forward from the waist onwards.
- Straighten the legs.
- Don’t change the positions of the palms as well as the right foot which is on the floor. Remember that your palms and feet must be kept flat on the floor as was done while practicing posture 3.
It’s from this position that you’ll rise upwards.
- Push backwards the pelvis.
- Keep your feet and palms flat on the floor.
- The arms must be kept vertical.
- The knees should be rigid.
- Slowly bend down your head.
- Bring the head between the upper arms.
- The upper arms should touch your ears.
- Draw in the abdomen.
- Gradually and without putting undue pressure at the back thighs attempt to bring your forehead towards the knees.
- The legs should be kept straight.
- Look upwards towards the waist.
- Remain in this position till you complete your exhalation.
Advantages
- Your spine becomes flexible.
- The muscles at the front of the thighs are also strengthened.
The 11th Surya Namaskar
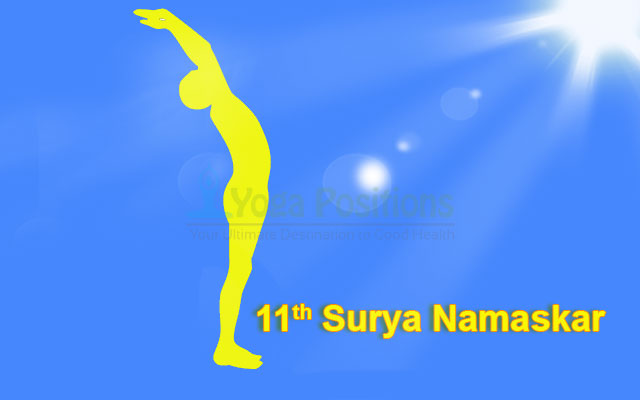
The 11th Surya Namaskar: This penultimate posture will bring you back to the second posture.
Methodology of the he 11th Surya Namaskar
The following tips provide the easiest means to resume the second posture:
- Slowly but deeply take the sixth breath (Inhale) as you stay in posture 10.
- Simultaneously bend backwards the upper portion of your body right from the hips as you resume the standing position.
- Don’t bend your elbows or the knees.
- The inside portions of your upper arms should touch the ears as you rise.
- Now, bring the arms straight above your head.
- Your palms will be pointing outwards.
- Complete the exhalation.
- Hold your breath.
- In that same relaxed tone, stretch backwards your arms and body.
- This backward bending action should be from the waist. But don’t bend your elbows or the knees.
- Push forward the pelvis and the abdomen. Your spine will make an anterior arch.
- Keep the head steady between the upper arms.
- Look backwards.
- Stay put in this position for about five seconds. Hold on to your breath.
The 12th Surya Namaskar
The 12th Surya Namaskar: The 12th posture returns us to the first posture. After its completion, you’d be concluding the Surya Namaskar.
Methodology of The 12th Surya Namaskar
Slowly return to the first posture. You can do it this way:
- Slowly exhale.
- At the same time, gradually lower your arms and straighten the spine.
- Your hands must be at the chest.
- Join the palms and again resume a prayerful posture.
- Complete the exhalation.
- Your arms must be brought down by your sides.
- Relax; stand upright; and look ahead.
Completion of a round
- This completes a complete round of the Surya Namaskar. Having relaxed for a few seconds, you can commence the next round from this very position itself.
- After completing all the rounds, give your body a complete relaxation phase with Savasana. There are several ways to do this Savasana. Here you will be lying down on the floor. Your eyes will be closed as in a sleeping pose. Your mind will be totally relaxed.
- With practice when you do the Savasana you will be able to place your palms flat on the floor on each side of your feet. Your fingertips will be in line with the toes which will be together with the heels on the ground.
2 comments
Can my children perform Surya Namaskar?
The practice of Surya Namaskaris beneficial for children and students in their growing age.